How to Use an AI Music Video Generator to Create Beat‑Synced Visuals
Practical guide to AI music video generators: how they sync visuals to audio, tool comparisons, step‑by‑step workflows, and distribution tips for social platforms.
If you want platform‑ready, beat‑synced visuals from a song, an AI music video generator can cut production time drastically. In this guide I explain how AI converts audio into visual cues, which tools give you millisecond precision, and practical workflows for TikTok, YouTube, Reels and Spotify Canvas. Read on to learn how core techniques like beat detection, spectrogram analysis and ML models create dynamic audio visualizer outputs you can export and deploy fast.
How AI converts music into visuals: core techniques (beat detection, spectrograms, FFT, ML models)
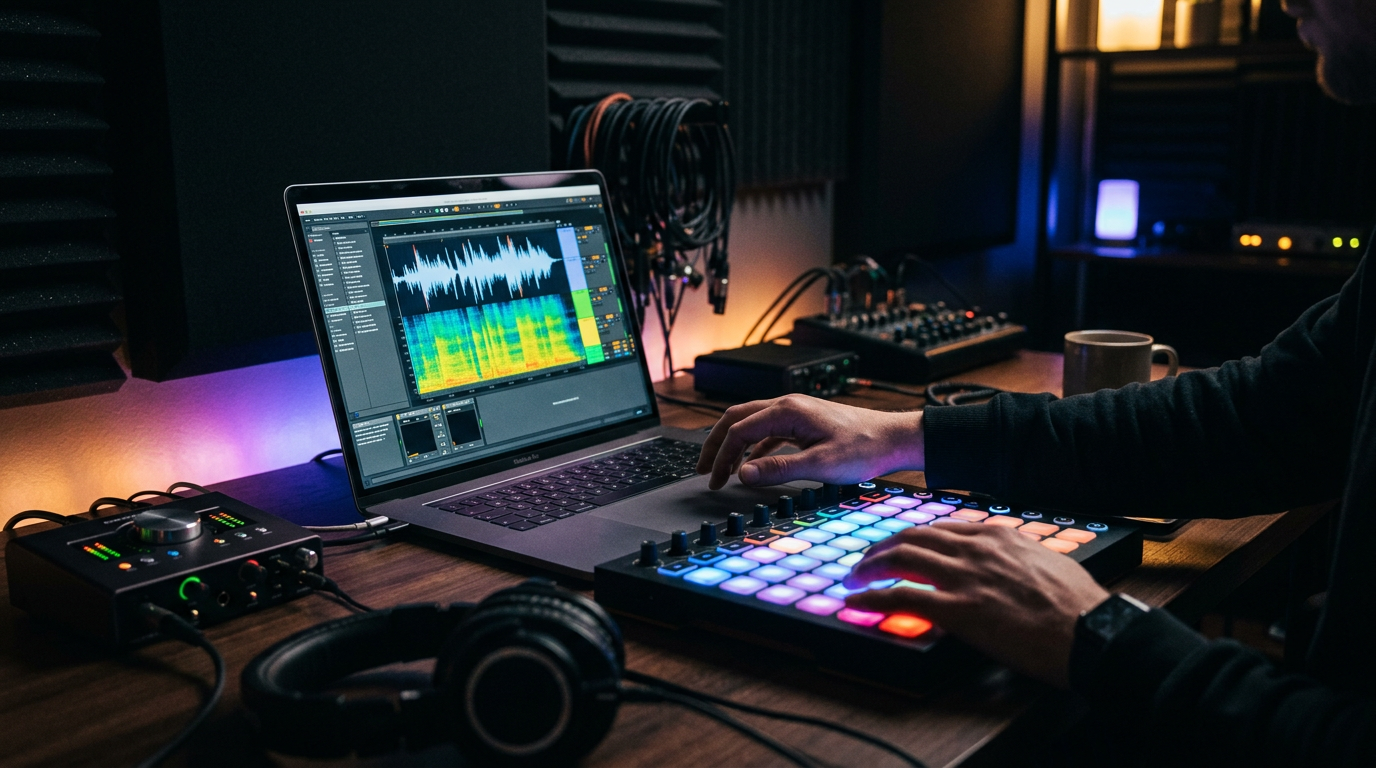
AI music video generators and audio visualizers start by turning the audio waveform into data the system can reason about. Two analysis families are central:
- Beat detection and onset analysis: algorithms scan the waveform for energy spikes and onsets (where notes or percussive events begin). These give discrete timing cues used for cuts, clip triggers, and tempo‑locked edits. Modern services advertise millisecond‑level beat precision by combining multiple onset detectors and tempo estimators to reduce jitter (commercial examples include BeatSync PRO and other pipeline tools).
- Spectral analysis (FFT and spectrograms): the Fourier transform decomposes audio into frequency bins over time, producing a spectrogram. Visual parameters such as shader intensity, particle emission, color mappings or frequency bands can be driven continuously from those bins. Spectral envelopes make it easy to map bass energy to scale/zoom and treble activity to fine particle motion.
On top of these deterministic analyses, machine learning models add semantic and rhythmic intelligence. Research like MuVi explores joint modeling of rhythm, timbre and scene semantics so visuals can match not just beats but the musical mood and instrumentation. In practice, many tools use ML to classify sections (verse, chorus), estimate tempo, or embed audio features that drive higher‑level animation choices.
Practical mapping examples you’ll see across tools:
- Peak → cut or camera snap
- Low‑freq energy → pulse/scale of an object
- High‑freq energy → particle brightness or motion blur
- Spectral centroid → color temperature
Because these methods are well understood, commercial visualizers (Pexo, Revid.ai, VibeMV, Exemplary AI) combine beat detection + spectrogram mapping to deliver automated, tempo‑aware visuals and platform‑specific exports.
What ‘beat‑synced’ and ‘audio‑reactive’ actually mean — measurable sync and limitations
'Beat‑synced' means visual events align to musical timing in a quantifiable way — cuts, effects or keyframes are tied to detected beats or tempo grids. 'Audio‑reactive' is broader: visuals respond continuously to audio features (volume, spectral bands) rather than only discrete beat markers.
Measuring sync uses timestamps. A tool claiming millisecond precision asserts that visual changes occur within a small lag—often <50 ms—relative to a detected beat. While some multi‑agent commercial pipelines claim near‑frame accuracy, real‑world precision depends on several factors:
- Analysis latency: on‑device or server processing can introduce delays. Batch processing tends to be more precise than real‑time feeds.
- Detection errors: noisy or heavily compressed mixes can confuse onset detectors, causing false or missed beats.
- Frame rate and export codecs: at 30 fps each frame is ~33 ms. Tight sync requires mapping beat timestamps to exact frame boundaries and using constant frame rates during render.
Limitations creators should expect:
- Semantic mismatch: automated tools may align to beats but not capture musical phrasing (e.g., long pads vs percussion) without section analysis or manual adjustments.
- Overfitting to tempo: strictly following detected beats can make visuals feel mechanical. Combining beat cues with randomized motion and machine‑learned style mitigates that.
- Platform variations: looped short formats (Spotify Canvas) need seamless loops, which can conflict with obvious beat hits unless the loop point is chosen on a musically neutral transient.
Best practice: validate beat maps visually or in a DAW/timeline, then nudge keyframes where the detector missed expressive cues. Many editors offer an audio waveform/spectrogram overlay for this exact purpose.
Survey of modern tools: category breakdown (generators, visualizers, editors) and when to use each
Tools fall into three practical categories and each fits different creator goals:
1) Generative music videos (text/image→video + audio analysis)
- Use when you need original, cinematic visuals or concept‑driven scenes that match a track. These combine text‑to‑video or image‑to‑video engines with audio analysis layers. They’re ideal for promotional music videos and longer form content. For raw generation you'll often start with a still image or prompt and let the model animate to audio cues. If you want to experiment, PlayVideo.AI’s /create-video tools are a fast place to test concepts.
2) Audio visualizers (waveforms, spectrums, reactive shaders)
- Use when you need rhythm‑aware motion graphics: classic rotating spectrums, waveform bars, particle fields and shader reactions. They’re the fastest route for singles, lyric clips, and streamer overlays. Services like Revid.ai, Pexo and Exemplary AI specialize here and often include platform presets for TikTok or Spotify Canvas.
3) Editor‑centric sync tools (timeline + keyframing driven by audio)
- Use when precision and editorial control matter. These are NLEs or plugins that import beat maps and let you keyframe, layer and fine‑tune transitions. This category is best for broadcast music videos or candid releases where micro‑editing of mood and timing is required.
When to pick which:
- Quick social drops: audio visualizers or generator presets with platform exports.
- Branded or narrative videos: generative music video pipelines with manual pass edits.
- Release‑quality tracks and sync licensing: editor‑centric pipelines to meet label specs (multiple export formats, stems, loudness control).
For asset creation, combine tools: generate imagery with /create-image, create music stems or beds with /create-music if you need variations, then assemble and refine in an editor or visualizer for final exports.
Comparing real tools for creators: precision, controls, export targets and costs
Commercial tools vary on four axes: beat precision, parametric control, export targets (length, aspect ratio), and pricing model.
Precision: BeatSync PRO and specialized beat‑sync services tout millisecond‑level alignment and multi‑agent analysis. Generic text‑to‑video generators (Runway, Pika or commercial equivalents) produce great visuals but often lack frame‑level audio reactivity; creators combine them with dedicated beat‑sync tools to achieve precise timing.
Controls: Editor‑centric tools expose tempo maps, gain thresholds, band pass routing and per‑effect envelopes. Visualizer utilities offer templates where you tweak mappings (e.g., map bass to scale). Generative tools provide style prompts and high‑level timing controls but fewer per‑parameter adjustments.
Export targets: Many commercial services export presets for TikTok (vertical 9:16), Instagram Reels, YouTube (16:9), and Spotify Canvas (3–8s loop). Pexo, VibeMV and others explicitly list platform presets to remove guesswork. Always verify aspect ratio and loop requirements before final render.
Costs: pricing models include subscription tiers, per‑render credits, and free limited exports. When discussing costs or how to get started with larger production needs, check PlayVideo.AI’s /pricing to compare plan value. For creators testing multiple versions, choose a plan with ample export credits or pay‑per‑export to avoid creeping costs.
Workflow tip: use a hybrid approach—generate high‑quality visual clips with AI video/image generation (/create-video, /create-image) and then run them through a beat‑sync or editor pipeline. This gives visual fidelity plus precise timing controls without paying premium fees for monolithic systems.
Designing visuals that read well on TikTok, Reels, YouTube and Spotify Canvas
Each platform has audience and technical constraints that alter creative decisions.
TikTok and Reels (vertical 9:16)
- Visuals must read on small, full‑screen phones. Use strong central focal points, bold contrast and readable typography. Fast cuts aligned to beats work, but avoid excessive micro‑jitters that cause motion sickness on handheld viewing. Export vertical 9:16 from the start; many tools include these presets.
YouTube (landscape 16:9)
- You can use wider compositions, richer depth and more subtle camera moves. Because viewers may watch on large screens, higher resolution and clean color grading matter. Sync to downbeats for rhythmic montage and to melodic cues for emotional cuts.
Spotify Canvas (3–8 second loops)
- These must loop seamlessly. Design looping choreography: avoid obvious hit points at loop edges, or align the loop boundary to a musical phrase boundary so motion restarts naturally. Remember Canvas is short—focus on a single visual motif or micro‑animation.
General design rules for audio‑reactive visuals
- Readability: map strong audio events (kick/snare) to clear visual beats (cut, flash, scale), and continuous audio features to subtle attributes (glow, blur).
- Hierarchy: prioritize one or two elements to react strongly; if everything reacts strongly the result is noisy.
- Contrast and color: low‑frequency energy reads well as scale/size changes; high‑frequency activity suits fine detail and bloom.
Practical export note: confirm frame rate (use constant frame rate), codec (H.264/H.265 for most socials), and size. Tools such as Pexo and VibeMV provide platform presets to avoid manual resizing and looping mistakes.
Practical 3‑step workflow: from track to finished beat‑synced video (examples + settings)
This workflow balances speed, control and platform readiness.
Step 1 — Prepare the audio and analysis
- Master or stem: use the final master or a stem you want to emphasize (e.g., instrumental). If you need variations, generate a short bed in /create-music to test ideas. Ensure loudness is within platform norms (Spotify/YouTube LUFS guidelines).
- Export a high‑quality WAV (44.1/48 kHz, 16–24 bit). Feed this file into your visualizer/generator so beat detection and FFT analyses have high fidelity.
Step 2 — Generate visuals and map audio features
- Choose a starting template that fits your platform (vertical for TikTok, 16:9 for YouTube, 3–8s for Canvas). Use an audio visualizer or AI music video generator with explicit beat detection (many services list auto tempo detection).
- Map cues: set threshold for onset detection (lower for subtle beats, higher for strong hits). Map low band to scale (0–30% → 100–120% scale), mid band to particle emission rate, and high band to brightness or blur. For cut precision, enable beat snap or quantize to the detected grid.
- Example settings (30‑second clip): BPM 120, onset threshold 0.15, low band gain +3 dB to exaggerate kick, particle lifetime 0.6s for clean tails.
Step 3 — Polish and export
- Manual pass: inspect beat map against the waveform overlay and nudge keyframes where detectors missed expressive accents (vocal chops, fills). If you used /create-video generated clips, trim to align hard cuts to downbeats and apply crossfades for smoother motion.
- Export presets: render vertical 1080×1920 (H.264, 30 fps) for TikTok/Reels, 1920×1080 for YouTube, and a 720×720 or 9:16 crop for Spotify Canvas but limit to 3–8s. Use constant frame rate and the highest bitrate within budget.
- Test loops: for Canvas, render the 3–8s clip and loop it locally to confirm seamlessness. If you see a jump at the loop point, offset the start by half a beat or choose a neutral transient as the boundary.
Example quick build: create an image collage in /create-image, animate with a visualizer mapping bass to scale and high frequencies to particle intensity, then finalize mix and export platform presets. If you need voiceover or narration, add an AI voice from /ai-voices and sync it using your beat map for punchy endorsements.
Rights, metadata and distribution: music licensing, platform requirements, and best practices
Rights and metadata are non‑negotiable when distributing music‑driven visuals.
Music licensing
- Use tracks you own or have licensed for the intended use (social, commercial, ads). Sync rights differ from mechanical or performance rights; if you plan to monetize or place the video in ads, secure a sync license from the rights holder or work with your label/distributor.
- For covers or remixes, ensure mechanical clearance and, if you monetize, explicit permission. Stock beds generated via /create-music can reduce clearance friction but check the tool’s commercial license terms.
Metadata and platform requirements
- Include accurate metadata (artist, track, label) in video descriptions and platform metadata fields to aid discoverability and attribution. For Spotify Canvas, upload via your distributor—Canvas must be tied to a track in Spotify’s catalog and meet the 3–8s looping spec.
- Aspect and length: confirm aspect ratios and codecs per platform. Many generators offer presets for TikTok/Reels, YouTube and Spotify Canvas; using those saves time and prevents rejections.
Best practices for distribution
- Prepare multiple exports: a looped 3–8s Canvas, a 9:16 15–60s vertical for TikTok/Reels, and a 16:9 full‑length video for YouTube. Keep masters (lossless WAV and high‑quality project files) for future edits.
- Track performance: A/B test different visual styles and export variants. Short vertical cuts can drive discovery; longer YouTube videos deepen engagement.
- Credits and calls to action: add a short end card or pinned comment with streaming links, credits to the production tools, and licensing notes where applicable.
When in doubt about legal use or metadata, consult your distributor or a music licensing professional. For creators looking to scale production with consistent assets, review pricing and plan options on PlayVideo.AI’s /pricing to match your release cadence and export needs.
Frequently Asked Questions
Do AI music video generators require stems or can they work with a single mix?
Most tools accept a single stereo mix and perform beat detection and spectral analysis from it. Stems give you more control (e.g., suppress vocals or emphasize bass) and improve detection accuracy for complex mixes.
Can I get perfectly frame‑accurate cuts using cloud AI tools?
Some services advertise millisecond precision and achieve close alignment, but real‑world accuracy depends on processing latency, frame rate, and detection quality. For absolute frame‑level control, export beat maps and perform a final pass in an editor.
Are generated visuals safe to monetize on streaming platforms?
Monetization depends on music rights more than the visuals. If you own or licensed the audio and the generator grants commercial usage, you can monetize. Always read the generator’s license and secure sync rights if necessary.
Conclusion
Start small and iterate: pick one song, generate a vertical clip for social and a short loop for Canvas, then compare engagement. Use an AI music video generator for fast concepting, combine generated assets from /create-image and /create-video for higher visual fidelity, and finalize precise timing in an editor if you need absolute sync. Track performance, refine mappings (bass→scale, high→detail), and lock a repeatable export routine aligned to platform specs so every release is consistent and platform‑ready.
Related on PlayVideo.AI: