Image-to-Product Video: A Tactical Playbook for Shoppable Shorts
A creator-focused playbook to turn product images into shoppable short videos using AI, Shopify carousels, and A/B tests that lift conversions.
Hook: If you have catalog photos gathering digital dust, you can convert them into shoppable short videos that scale creative output and drive measurable lift. This playbook shows exactly how to turn an image to product video pipeline into repeatable revenue.
The primary keyword image to product video is central to these tactics: we focus on fast, AI-driven workflows, the right apps to pick, and practical implementable tests for Shopify and paid social. Read on for step-by-step guidance, templates, and test plans you can run this week.
Why image-to-product video + shoppable shorts are now a must for ecommerce
AI image-to-video tools have changed the economics of creative production. Where teams once commissioned videographers or stretched product photos across ads, many merchants can now turn a single product image into a short, scroll-stopping clip in under a minute—making rapid scaling of creative feasible for merchants. Recent tool guides report 30–60 second workflows for a single asset, which enables generating dozens of variants quickly.
Beyond speed, shoppable shorts solve two core merchandising problems: attention and conversion. Short-form formats (5–15s for social, 15–30s for PDP carousels) fit feed behavior while shoppable overlays shorten the path to purchase. Category-level analyses and vendor roundups from 2024–2026 highlight measurable gains: one industry writeup documents up to a ~34% lift in conversions when static images were replaced by AI-generated shoppable videos in tested contexts.
For growth teams, that means creative capacity directly affects acquisition efficiency. Tools now support one-click product tagging, auto-resize for Reels and Shorts, in-player buy links, and CDN-hosted delivery—features that reduce manual steps and improve performance. But implementations come with tradeoffs: on-site players increase dwell and direct purchases but require attention to page speed and CDN hosting, so plan for lazy-loading and performance checks. This section frames why moving from image to product video is no longer optional if you compete on conversion and cost-per-acquisition.
Which AI tools and apps actually convert images into product videos (comparison & selection guide)
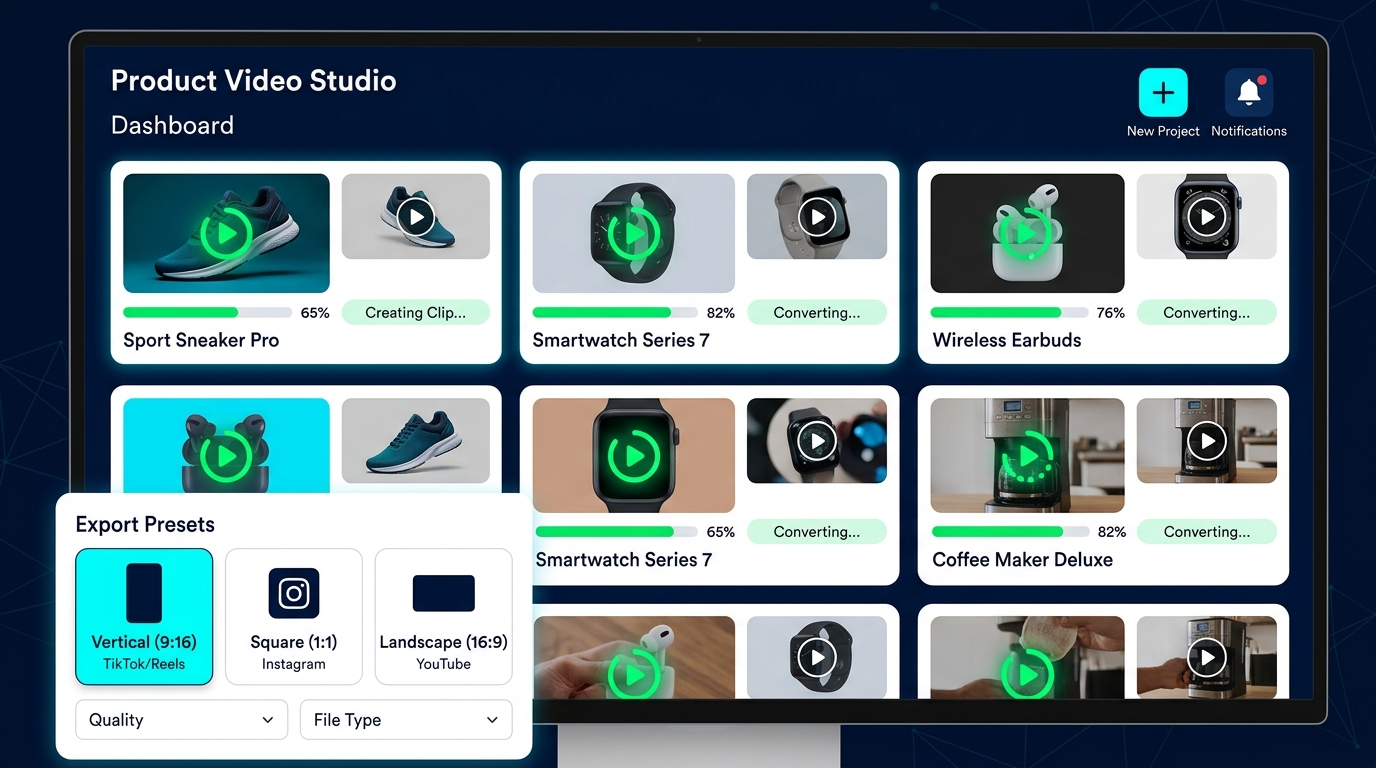
The ecosystem matured quickly between 2024 and 2026. Multiple roundups and Shopify app listings highlight a set of AI-first makers and shoppable-video platforms (TopView, Creatify, Vidoo, Tolstoy and others appear repeatedly). When choosing a tool, evaluate four practical criteria: 1) image-to-video quality and speed, 2) product tagging & catalogue integration, 3) export presets for vertical/square/landscape, and 4) shoppable overlay or deep-link support.
A tactical selection approach:
- Start with a fast generator that supports batch processing and vertical auto-resize. This saves hours when producing variants for feeds. Many tools now deliver 30–60s per asset workflows.
- Prioritize apps that auto-import SKUs from your Shopify catalogue and support one-click tagging—this reduces manual mapping between creative and PDPs.
- Confirm CDN hosting and in-player buy links or PDP deep links to preserve attribution in paid campaigns. Look for analytics features that report video-driven conversions.
- Test with a free tier or small paid plan; vendor roundups suggest similar baseline features across lead apps, so the UX and speed often become the deciding factor.
If you plan to add music or voiceover, ensure the tool exports stems or accepts multi-track uploads so you can apply audio consistently. For creative effects—motion, reveal, and camera-simulated parallax—consider a platform that exposes motion templates and an effects library; for PlayVideo.AI’s video creation you can use the AI Video Generator at /create-video to convert images into videos and pair with effects from /effects.
Selected apps often cited in 2025–2026 reviews include a mix of dedicated image-to-video engines and shoppable-video hosters. Use these selection criteria to quickly shortlist 2–3 vendors and run a hands-on trial with 10 SKUs before committing to scale.
A simple 5-step workflow: from product image to platform-ready shoppable short
You want a repeatable pipeline that minimizes manual effort. Here’s a 5-step workflow designed for ecommerce teams producing image to product video assets at scale.
1) Source & normalize your images
- Export high-resolution product shots from your CMS or mobile uploads (white background and lifestyle). Use /create-image for any quick edits or background fixes. Normalize aspect and resolution so the AI tool receives consistent inputs.
2) Batch convert to short videos
- Use an AI generator that accepts bulk uploads. Choose templates for duration: 5–15s for feed ads, 15–30s for PDP carousel slots. The fastest tools produce a short clip from one image in 30–60 seconds, letting you scale quickly.
3) Add motion, text treatments, and audio
- Apply motion presets (slow parallax, 3D pop, rotate-reveal) and concise callouts (size, USP). If you need background scores or sound design, use /create-music to generate short loops that loop cleanly under a 5–15s ad.
4) Tag and export shoppable variants
- Tag each video with SKU and PDP deep-link metadata so your shoppable overlay can map instantly. Export variants in vertical, square, and landscape sizes to avoid repeated re-exports later.
5) Publish via CDN and embed or distribute
- Upload to your shoppable player or CMS with CDN hosting enabled. For social and paid media, push vertical/square variants directly into ad platforms. For onsite carousels, implement lazy-loading and prefetch the first frame to protect LCP.
Repeatability notes: Automate steps 1–4 using app integrations or small scripts where possible. Use PlayVideo.AI’s /create-video to automate batch conversions and save export presets that include product metadata so you're not mapping SKUs manually each time.
Design patterns that work: templates, motion styles, and product-carousel layouts
Design matters more when you scale: the right motion and layout keeps attention and preserves clickable space for shoppable overlays. Start with a handful of proven patterns and standardize them across categories.
Template recommendations:
- Hero Reveal (5–8s): slow zoom + subtle parallax, center product, single-line headline. Best for high-ASP items.
- Feature Cut (8–12s): three quick product shots or detail crops, 2–3 word captions per cut, ends on CTA with buy tag. Great for feature-driven products.
- Lifestyle Loop (10–15s): lifestyle photo sweeps into product close-up; use for social placements.
Motion styles and treatments:
- Parallax and depth simulation: adds perceived value without heavy motion. Keep easing smooth to avoid motion sickness.
- Micro-rotations and scaling: implies 360 feel from a single image. Use for fashion and accessories.
- Text reveal with masking: preserves safe zones for overlays. Avoid covering SKU area where shoppable tags appear.
Carousel layouts for PDPs and homepages:
- Swipeable Product Carousel: show 3–6 short clips per carousel, each with its own tag that maps to the product detail. Implement lazy-loading of off-screen slides to protect load times.
- Single-player with thumbnail strip: central player swaps source on thumbnail click—good when you want more control over autoplay and analytics.
Practical constraints: keep the shoppable controls in consistent positions (bottom-right or top-right) so users don’t miss them. Pre-bake vertical, square, and landscape variants to match ad placements. These patterns reduce creative review cycles and make A/B split assignments cleaner.

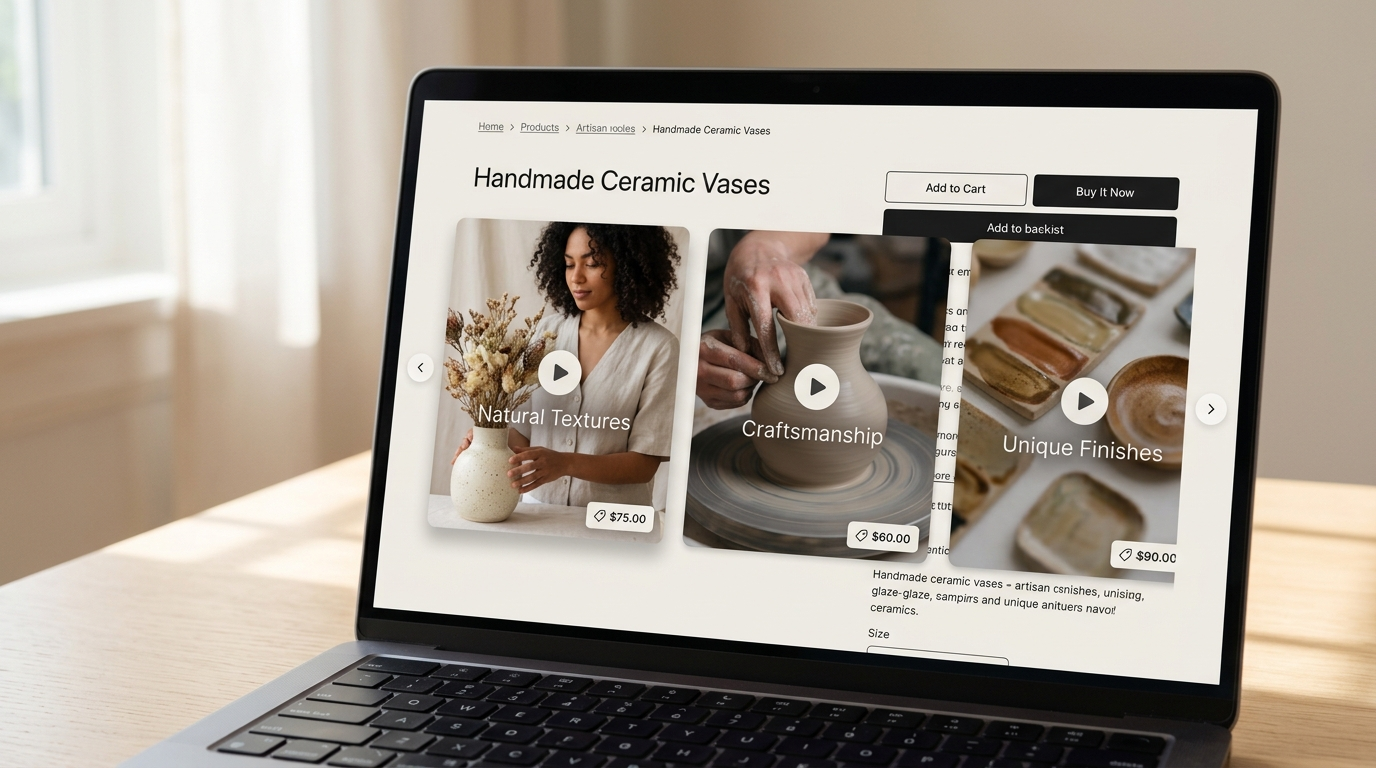
How to add shoppable overlays & carousels on Shopify and other storefronts
Shopify and third-party app ecosystems now make it straightforward to add shoppable overlays and carousels. Many apps support auto-import from product catalogues and UGC sources such as Instagram, TikTok, and YouTube. Practical implementation steps:
- Choose a shoppable-video app with Shopify integration listed in the app store; verify it supports one-click product tagging, CDN hosting, and PDP deep links. App-store category listings (2024–2026) emphasize these merchant features.
- Install and configure product sync. Allow the app to read your catalogue so videos can be auto-tagged. Several apps also provide widgets to embed swipeable carousels on homepages and product pages; follow the app’s snippet instructions or use a page builder. Posstack’s how-to demonstrates adding shoppable video carousels on Shopify in "5 minutes," which is a useful operational reference.
- Map video metadata to PDPs. Ensure the video player uses SKU-level deep links to direct clicks to the right PDP or add-to-cart flow. Confirm analytics capture add-to-cart events and video engagement metrics.
- Performance safeguards. Use CDN hosting, pre-generate multiple aspect ratios, and lazy-load offscreen carousels to keep page-speed impact low. Recent app guides recommend testing pageload impact and lazy-loading carousels to maintain Core Web Vitals.
- For non-Shopify platforms, follow the same principles: embed a hosted player or use a script tag the vendor provides. Confirm the player supports in-player buy links or returns a deep link to your checkout flow.
If you’re using PlayVideo.AI to produce assets, link your exported videos into the player and use /create-music and /ai-voices for consistent audio and narration across shoppable assets.
Measurement, A/B testing and unit economics: what to track and target
Set up measurable experiments before you roll out video across the catalogue. A repeatable test plan includes holdout A/B tests on product pages comparing static images vs. AI-generated shoppable videos. Key metrics to track:
- Add-to-cart rate per product page
- Conversion rate (purchase / session)
- Revenue per visitor (RPV) and average order value (AOV)
- Creative CPM and ROAS when assets are used in paid social
- Engagement metrics: view-through rate, hover-to-click on shoppable tags
Testing cadence and expectations: run tests at SKU or category level and let them mature 30–90 days depending on traffic. Industry analyses indicate expected ROI timelines of 30–90 days for small-to-mid stores traffic-testing campaigns. Use a minimum detectable effect and ensure statistically valid sample sizes before deciding.
Economic framing: include production costs (tool subscription or credits), incremental ad spend, and expected conversion lift. Because AI tools reduce per-asset time dramatically, creative costs will often shift from production to testing and iteration. A practical spreadsheet model:
- Baseline: current conversion rate and RPV with images
- Treatment: conversion uplift percentage (use conservative estimate 10–15% if you lack category data, or the reported upper bound ~34% as a best-case)
- Run break-even analysis incorporating tool monthly costs (/pricing) and ad budget to determine how many incremental conversions you need to justify rolling out site-wide.
Attribution & analytics notes: ensure the shoppable player surfaces events to your analytics stack (server-side or client-side tracking) so you can attribute add-to-cart and purchases back to the creative. Many Shopify app listings now include built-in analytics to simplify this step.
Quick wins and real-world examples: content that moved the needle
Practical examples accelerate adoption. Here are quick-win experiments ecommerce teams can run this week and examples from recent writeups:
- Replace hero images on best-selling PDPs with a 15s carousel clip. Use a test group of 10 SKUs and run a holdout for 30 days. Several vendor roundups reported conversion uplifts in early pilots—one writeup cited up to ~34% lift when static images were swapped with shoppable videos.
- Create a 5–10s feed ad loop from a high-converting image and test CPM and creative ROAS. Pre-bake vertical and square variants to test both Reels and Stories placements. Track creative CPM and optimize toward lower CPM with stable conversion rates.
- Aggregate UGC (customer photos) into a swipeable on-site carousel. Many Shopify apps auto-import UGC from Instagram and TikTok and map them to SKUs, reducing manual compilation.
- Use product-carousel widgets on the homepage that feature top-margin SKUs with inline buy links. This shortens the purchase path for high-intent visitors.
Real-world example: a midsize apparel merchant ran a 60-day test swapping static PDP imagery for AI-generated 15s carousel clips on 50 SKUs. They saw a statistically significant increase in add-to-cart rate and higher RPV within 45 days, covering the platform subscription in month two. Case study summaries and app roundups from 2025–2026 suggest this timeline is typical for small-to-mid stores.
Actionable quick list to try this week:
- Pick 10 SKUs and generate vertical and square 5–15s clips using /create-video.
- Add audio from /create-music and optional narration from /ai-voices for consistency.
- Install a shoppable carousel app from the Shopify app listings and sync those 10 SKUs.
- Launch a holdout A/B test on those PDPs and run for 30–60 days while monitoring add-to-cart and RPV.
These focused experiments minimize risk and surface learnings you can scale across the catalogue.
Frequently Asked Questions
How fast can I convert a catalog photo into a shoppable short?
Many AI image-to-video tools report 30–60 second workflows for a single image, plus a few minutes to add metadata and export variants. Batch processing reduces per-asset time further.
Do shoppable videos hurt page speed?
They can if implemented naively. Use CDN-hosted players, lazy-load offscreen carousels, and pre-generate multiple aspect ratios to avoid runtime resizing. Test Core Web Vitals after launch.
What sample size do I need for a valid A/B test?
Required sample depends on baseline conversion rate and expected uplift. Use standard power calculations—run tests until you reach statistical significance or the minimum detectable effect your business requires, typically over 30–90 days for mid-size stores.
Conclusion
Start with a constrained experiment: pick 10 SKUs, produce vertical and square 5–15s variants with automated metadata, and launch a holdout A/B test on PDPs while running a parallel paid social creative test. Use the selection criteria in this guide to choose a tool, protect page speed with CDN and lazy-loading, and measure add-to-cart rate, conversion rate, RPV, and creative CPM. If your test delivers a meaningful uplift within the 30–90 day window, scale category-by-category using templates and batch automation.
To get started today: generate your first batch with PlayVideo.AI’s /create-video, add consistent audio from /create-music or narration from /ai-voices, and evaluate hosting and shoppable overlays before you publish. Follow the 5-step workflow and measurement plan above to convert image assets into repeatable revenue drivers.
Related on PlayVideo.AI: