Deepfake Reels Tutorial: A Creator-First Face-Swap Workflow
A practical deepfake reels tutorial: step-by-step face-swap workflow, tool choices, realism tips, scaling, and a safety/legal checklist for creators.

Want a practical, production-ready deepfake reels tutorial that gets you consistent, realistic face swaps for Instagram Reels and TikTok Shorts? This guide walks creators and small studio teams through an end-to-end workflow: pick the right tool, prepare inputs, run a swap, tune temporal and color consistency, automate at scale, and — critically — apply a safety and legal checklist before you publish. Throughout, the focus is on repeatable steps you can use to produce platform-ready short-form face-replacement content while minimizing technical pitfalls and legal risk.
Why creators are using AI face swap for short-form video (opportunity + risks)
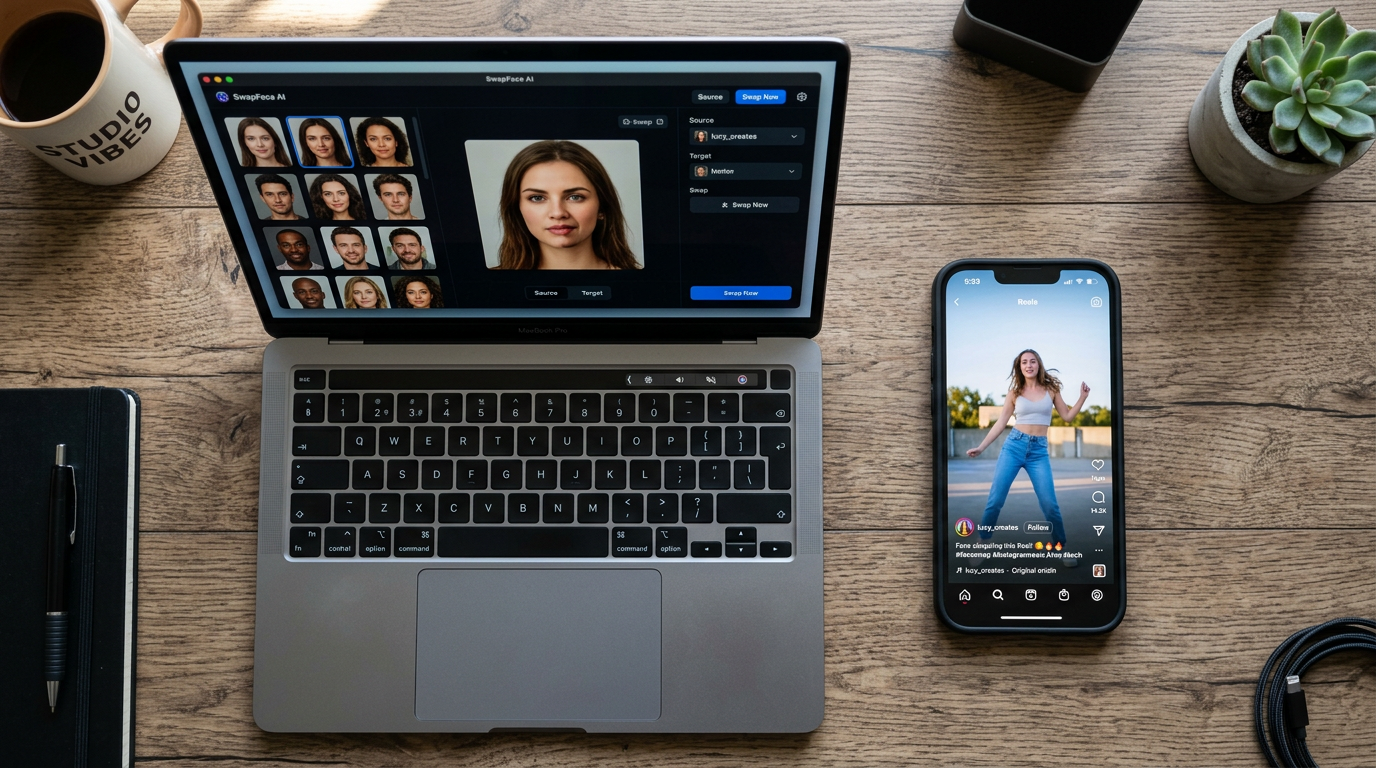
Creators use face-swap tools for short-form video because they dramatically reduce the time from idea to publish. Mobile and web apps prioritize speed and social exports — many let creators produce swaps in seconds and share directly to Reels or Shorts, which is why short-form platforms are the primary use-case for many face-swap apps. Consumer apps such as Reface and newer web services focus on low-friction UX and one-tap social sharing (Evolve Feed overview).
That speed creates clear creative opportunities: parody, branded character swaps, quick talent replacement for multilingual versions, and fast A/B tests for thumbnails and hooks. But the risks are equally real. Low-effort swaps often show temporal jitter, lighting mismatches, and obvious artifacts that harm credibility. Beyond quality, legal and ethical risks—especially non-consensual use and likeness misuse—are serious. Jurisdictions and platforms have added or discussed rules regulating malicious deepfakes; creators must understand both platform policies and evolving state-level laws (Deepfake legal summaries).
Practical takeaway: use quick mobile apps for prototypes and short clips when you have consent and a low-risk concept; use pro toolkits when you need higher fidelity, temporal stability, or when publishing high-reach content.
Choose the right tool: comparing face-swap apps and pro toolkits for Reels
Pick your tool based on the target shot complexity, motion, and your comfort with desktop GPU workflows. There’s a clear split in recent 2025–2026 testing: mobile/web apps (Reface, FakeMe, and other Wombo/HeyGen variants) are fastest for short social clips and direct exports; specialized services and professional toolchains (MagicHour.ai, VidMage, Remaker AI, and DeepFaceLab-style frameworks) produce more consistent temporal stability for longer or high-motion footage (FakeMe roundup; MagicHour blog).
When to pick mobile/web apps:
- One-off Reels or Shorts under 30 seconds
- Low-motion scenes or static talking-heads
- Fast iteration and direct social posting
When to choose pro toolkits:
- High-motion clips or multi-shot scenes
- Higher fidelity needs (brand safety, paid placements)
- When you require fine control over tracking, model training, and temporal networks
Tradeoffs to factor in: learning curve, cost, and turnaround. Pro frameworks like DeepFaceLab give the best control and quality but require desktop GPUs and a steeper learning curve (DeepFaceLab paper). Managed services and specialty providers reduce setup friction and often include temporal filters that produce smoother motion, saving time during grading.
Prep your assets: the photo/video inputs that make or break a realistic swap
Input quality is the dominant determinant of swap quality. Multiple guides emphasize matching head angle, expression, lighting, and resolution between your source face images and the target video. Sourcing multiple source images with varied angles and expressions dramatically reduces artifacts and improves model convergence (FakeFace KB).
Practical asset checklist:
- Target clip: trim to the core action, stabilize shaky footage, and remove camera crops. Short-form formats favor 9:16 framing; plan for safe margins in post.
- Source faces: provide 8–20 high-resolution images covering front, 3/4, left and right profiles, neutral and expressive shots. If using a single clean photo, expect more blending problems.
- Lighting references: include at least two images that show the source under similar light direction and temperature as the target. Some services auto-analyze scene lighting and apply adjustments, but feeding a matched reference reduces guesswork (Summrs guide).
- Audio and motion notes: keep a clean audio track and mark major head turns, blinks, and expression peaks; these are the moments you’ll check during temporal smoothing.
Prepping well saves training or processing time and reduces post-blend fixes. If you use image-generation to create face assets (for stylized swaps or avatars), use a dedicated image tool like PlayVideo.AI's image generator to create matching head angles and lighting (/create-image).
Step-by-step face-replacement workflow (frame extraction → model → blend → export)
A robust face-replacement workflow breaks the job into discrete, repeatable stages. This reduces debugging time and clarifies what to automate for scaling.
1) Clip selection & stabilization
- Select the tightest segment that contains the performance you need. Stabilize if the camera shake is significant; stabilization reduces tracking errors downstream.
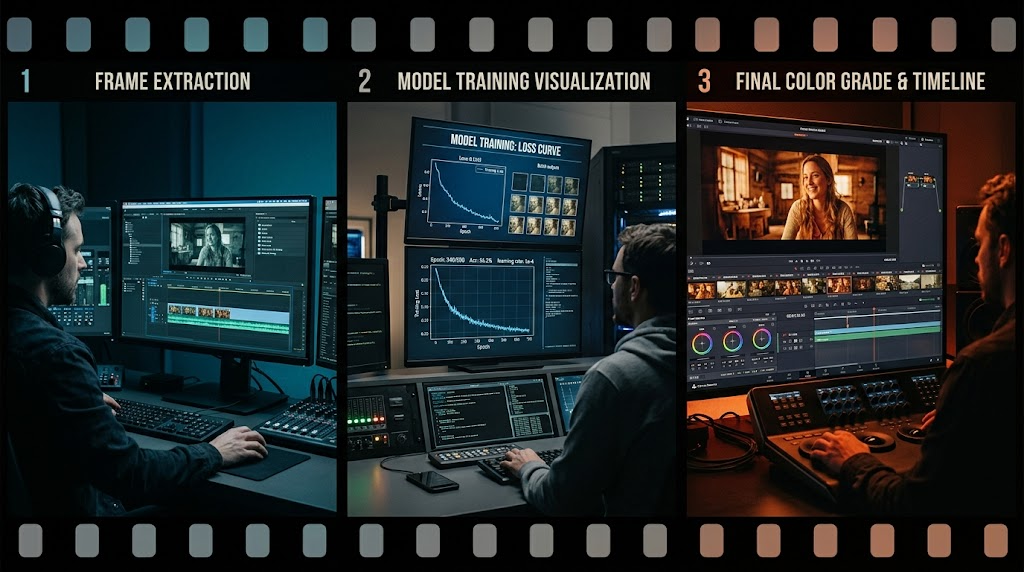
2) Face detection & frame extraction
- Run a face tracker that produces per-frame landmarks and bounding boxes. Export a frame sequence at your target frame rate; keep an index of problematic frames (extreme occlusion, motion blur).
3) Model swap / algorithm run
- For mobile/web apps, import the clip and source face(s) and use the app’s guided pipeline. For pro workflows, train the model (DeepFaceLab-like) or run a specialized engine. Monitor loss curves or fidelity metrics if available; re-sample source images if the model fails to converge.
4) Temporal smoothing & blend
- Apply temporal filters or a smoothing pass to reduce jitter. Blend methods include feathered alpha masks, multi-band color transfer, and shadow reconstruction. Tools that support spatio-temporal models will usually offer better frame-to-frame consistency (MagicHour blog).
5) Color match & final grade
- Use color transfer and matched white balance to bake the face into the scene. Reconstruct key shadows where the replacement face sits under directional light. Final-grade the whole clip to ensure skin tones, highlights, and midtones look natural (Summrs techniques).
6) Export for social
- Reformat to 9:16, apply platform-safe encoding presets, and embed captions/stickers as needed. Keep a master H.264 or HEVC file and a platform-optimized copy.
During each stage, keep a log and a versioned output so you can revert or re-run a single stage without repeating upstream work. If you generate new assets or need background music, PlayVideo.AI's video and audio tools can be used in parallel: generate or edit video assets (/create-video) and create soundtracks with /create-music or voice-over with /ai-voices.
Realism checklist: lighting, motion, temporal smoothing and color match techniques
Realism hinges on technical details. This checklist groups the most impactful fixes you should always inspect before considering a swap finished.
Lighting and color
- Directional match: ensure highlights and shadow directions on the replacement face match the scene. Use a shadow-reconstruction pass if necessary.
- Temperature and saturation: apply color transfer and matched white balance; test with split-screen before committing.
Motion and temporal consistency
- Landmark stability: check facial landmarks across 10–20 frames around any head turn. If points wobble, rerun the tracker with tighter crop or a higher-quality detector.
- Temporal smoothing: prefer tools with spatio-temporal models; if not available, apply per-pixel temporal filters or optical-flow based warping to reduce flicker (Magichour and multi-face swap references).
Blend and edges
- Feathering & alpha masks: use soft feathering near high-frequency details like hair and beards. For facial hair, consider mixing original hair pixels with the replacement to preserve realistic edges.
- Multi-band blending: combine low-frequency color transfer with high-frequency texture from the replaced face to maintain skin texture and pores.
Eye and mouth fidelity
- Blink handling: ensure the source includes blinks or use a blink-aware model. Mismatched blink timing is a fast giveaway.
- Lip-sync alignment: for spoken clips, prioritize jaw movement and mouth shape matching; small offsets are noticeable on close-ups.
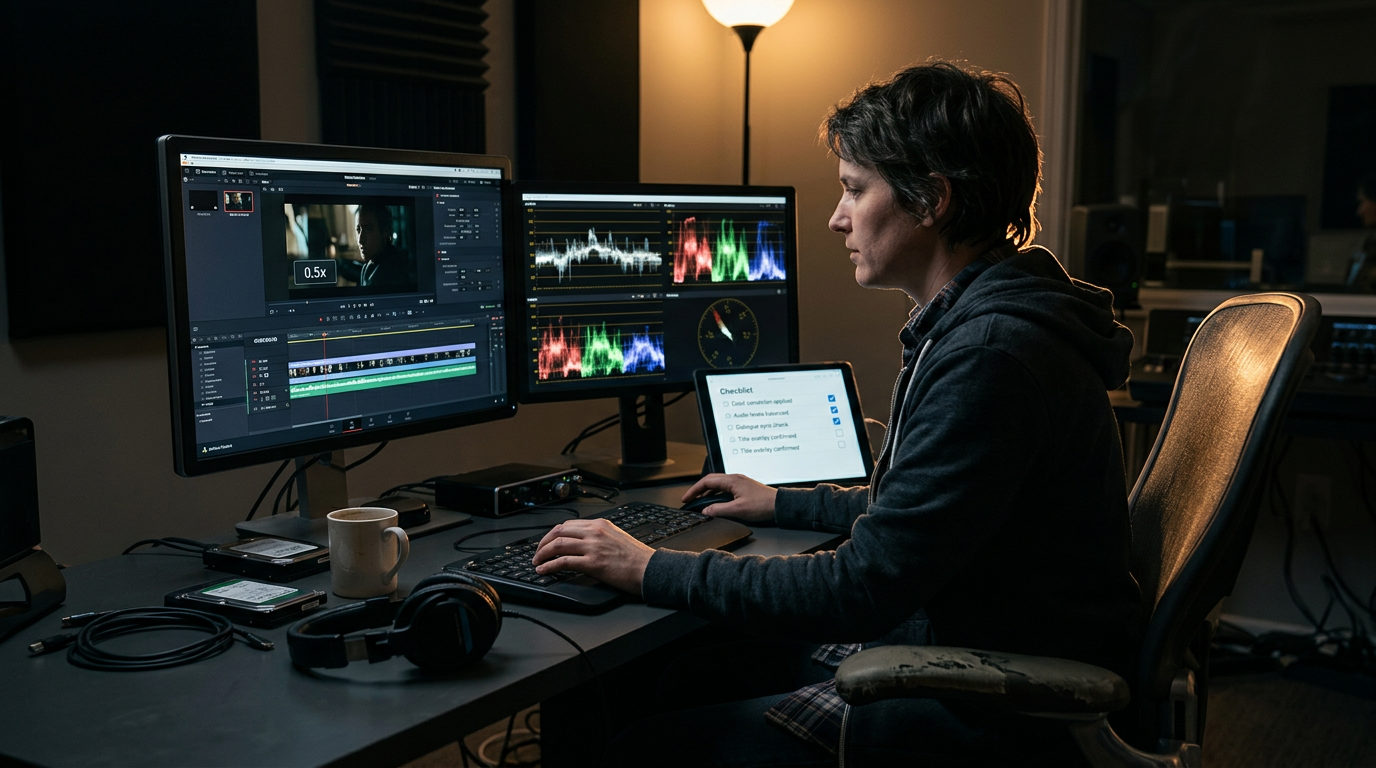
Quality control routine: export a 10–20 second review clip with playback at 0.5x and 1x speed, and inspect the realism checklist frame-by-frame. If you automate, include a fidelity score that flags landmark jitter, color delta, and temporal variance before human review (Cracked.ai workflow guidance).
Scaling & batching: automating swaps, templates, and quality gates for frequent Reels
When you produce many Reels, manual work becomes the bottleneck. Scale by separating repeatable parts of the pipeline and adding quality gates.
Automation points
- Batch frame extraction: process multiple clips through the same tracker settings and export indexed frame packs.
- Template masks and anchor maps: create reusable masks for common shot types (tight head-and-shoulders, three-quarter) so blending parameters carry across projects.
- Auto-select sources: maintain a labelled library of source faces with metadata (angles, lighting tags, accepted uses). A scripted selector can pick the best candidate automatically, reducing choice paralysis.
Quality gates and human review
- Fidelity scorecard: compute automated checks—landmark stability, color delta (ΔE), and temporal variance—and block any output that fails thresholds.
- Human-in-the-loop review: route outputs that pass automated checks to a reviewer who inspects for consent issues, obvious artifacts, or brand compliance. Industry guides recommend this step to prevent publishing low-quality or risky swaps (Cracked.ai).
Tools that help scale: use managed services that support batch processing and APIs, or build wrappers around desktop toolkits to queue jobs on a GPU farm. Keep versioned templates so that a fix to a template automatically backfills new exports. For audio and music beds at scale, integrate /create-music so each batch receives a consistent sonic signature.
Safety, consent, and legal checklist before you publish
Publishing a face swap without the right checks invites platform takedowns, legal exposure, and reputational harm. Treat this checklist as required pre-publish gating.
Consent & documented rights
- Obtain explicit, written consent from any real person whose face you will use. Store signed releases or digital messages and record the content permissions (commercial use, territorial limits).
Platform policies & local law
- Review the platform’s deepfake and impersonation policies. Some platforms restrict or label manipulated media; others ban sexually explicit non-consensual deepfakes.
- Check regional law: a number of jurisdictions have laws or pending bills addressing non-consensual deepfakes and likeness misuse (legal scholarship and Wikipedia deepfake overview). When in doubt, consult counsel for high-risk content.
Transparency & provenance
- Consider adding an on-screen disclosure for swaps, especially when using a public figure or in a sensitive context. Detection and provenance research is advancing, and some creators embed metadata or visible markers to signal a synthetic edit (FAME attribution research).
Risk scoring and final gate
- Before publishing, run a risk score that combines subject consent, potential reputational reach, political/sensitive context, and technical fidelity. Anything that scores high on ethical or legal risk should be escalated to legal or removed.
If you use PlayVideo.AI to produce complementary assets, link usage to account and plan settings on /pricing so you can track production cost and team access. For voice replacements or localized narration, integrate /ai-voices so the whole package (visuals + audio) is covered by your release.
Frequently Asked Questions
Can I use mobile face-swap apps for professional client work?
You can for low-risk, social-first projects with explicit consent and simple shots. For higher-stakes or high-motion footage, use pro toolkits or managed services for better temporal stability and control.
How many source images do I need for a realistic swap?
Aim for 8–20 high-resolution images covering frontal, three-quarter, and profile angles plus varied expressions. More matched lighting examples reduce artifacts and training time.
Will a high-quality deepfake always be undetectable?
No. Detection and attribution research is advancing; even high-quality swaps can be flagged by forensic models. Use transparency and provenance best practices where appropriate.
Conclusion
Start with a prototype: pick a short, consent-cleared clip and run it through a fast mobile/web app to learn the limits of a simple swap. Then run the same clip through a pro pipeline to see what temporal and color fixes you’d need to scale. Build templates for your common shot types, add automated fidelity checks, and require a human review and consent artifact before any publish. Use the realism checklist in every review, and keep legal and platform policies in your release workflow so the creative gains of face-swap Reels don’t become a liability. When you’re ready to integrate AI-generated visuals or audio into that pipeline, use /create-image for assets, /create-video for assembled clips, /create-music for soundtracks, /ai-voices for narration, and manage team access and billing through /pricing to run at scale.
Related on PlayVideo.AI: